Straight Pictures
How do I hang my pictures straight?


Hanging pictures can seem simple, but anyone who has hammered a nail into the wall only to find their frame sitting wonky knows it’s trickier than it looks. Whether you’re hanging a single artwork or planning an entire gallery wall, here are the steps to make sure everything is straight, secure, and looking its best.
Hanging a Single Picture Straight
1. Measure Twice, Hammer Once
Find the center point of your wall or the area where you want the picture.
Measure the distance between the top of your frame and the hanging hardware (hooks, wire, or D-rings).
Mark the exact spot on the wall where your hook or nail should go.
2. Use a Level
A spirit level (or even a smartphone level app) is your best friend.
After hanging, place it along the top edge of the frame to check if it’s straight.
Adjust slightly if needed.
3. Wall Bumpers Help
Stick small rubber bumpers or felt pads on the back bottom corners of your frame.
These stop your picture from tilting when people walk past or when doors slam.
Use silicon double sided tape to stick on wall
4. Use Two Hooks Instead of One
For wider frames, hang with two hooks/nails instead of just one.
This stops the picture from swivelling sideways and helps it stay level.
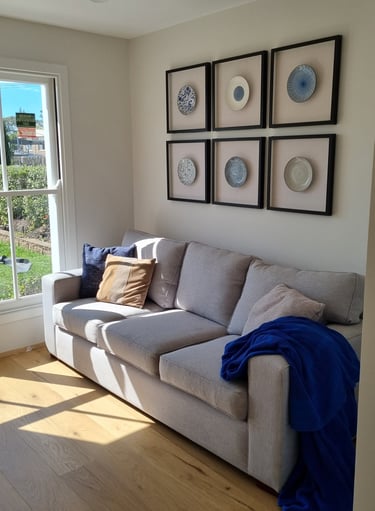
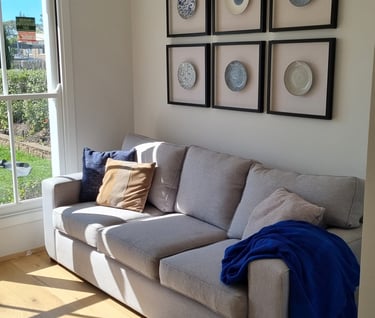
How to Hang 3 Pictures Straight in a Row
1. Decide on Orientation
Horizontal row (side by side) works well above a sofa or bed.
Vertical row (stacked top to bottom) is great for narrow wall spaces.
2. Align to a Line
Pick which part of the frames you want to align:
Top edge – neat and structured look.
Bottom edge – grounds the arrangement if above furniture.
Centre line – if one frame has a different size.
3. Measure and Mark
Find the total width (or height) of all 3 frames plus the spacing between them.
For horizontal rows:
Mark the center point on your wall.
Work outwards to each side so your row is perfectly centered.
For vertical rows:
Mark the center frame first at eye level, then measure up and down for the other two.
4. Keep the Gaps Even
A good rule of thumb: 5–10 cm (2–4 inches) between each picture. Bigger pictures up to 20 cm (8 inches).
Use a ruler or cut a small spacer strip of cardboard/wood to place between frames as you hang them.
5. Hang with a Level
Use a spirit level across two frames at once to check alignment.
If your frames have hanging wire, measure the distance from the top of the frame to the wire when taut — mark that spot for your nail/hook so all three sit at the same height.
6. Final Check
Step back and check from a few angles.
Tiny adjustments make a big difference when pictures are side by side.
✅ Quick Tip:
If you’re worried about small misalignments, align the centers of the pictures. Our eyes naturally follow the middle line, and tiny differences in top/bottom edges won’t be as noticeable.
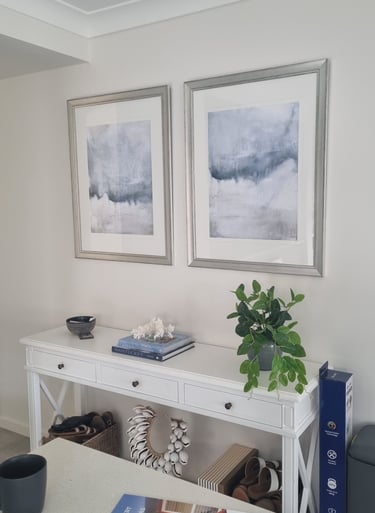
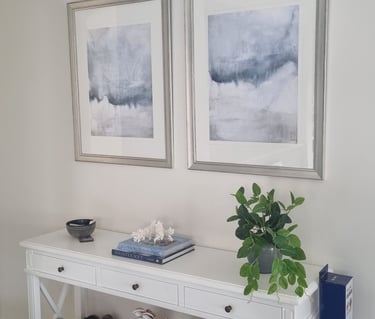
Getting a Gallery Wall Straight and Balanced
Creating a gallery wall takes a bit more planning, but the results are worth it.
1. Plan Your Layout on the Floor
Lay all your frames on the ground first.
Play around with arrangements until you find a layout you love.
Take a quick photo so you remember the setup.
2. Use Paper Templates on the Wall
Cut out paper the same size as each frame.
Tape the paper pieces to the wall with painter’s tape.
Move them around until you’re happy with the spacing and balance — no holes in the wall yet!
3. Keep Spacing Consistent
A general rule: 5–8cm (2–3 inches) between frames looks balanced.
Use a ruler or spacer block to keep gaps even.
4. Work Around a Central Line
For neatness, choose either the top line, bottom line, or the center line of your frames to align.
This gives the whole wall a sense of order, even with different frame sizes.
5. Step Back Often
After hanging a few frames, step back and look at the wall from different angles.
Small adjustments now make a big difference later.
💡Quick Tips for Stress-Free Hanging
Always check if the ceiling is straight. I have seen many homes where the ceiling is in an angle and distance to floor differs up to 2 cm from one corner to the other of the room.
Aligning to door frames or arches check if both corners have the same hight.
Sometimes a picture can look unlevelled even when it is. Check the frame or colours and arrangements in the painting. Adjust the picture to what you feel right and look straight.
✨ With these steps, you’ll have straight-hanging artwork and a gallery wall that feels balanced, stylish, and personal.